Ultimate Guide to Giant Rainbow Floam Slime DIY Instructions
Jump to Section
The Magic of Giant Rainbow Floam
There is nothing quite as satisfying in the world of sensory play as Giant Rainbow Floam Slime. Combining the visual appeal of a vibrant color spectrum with the crunchiest texture imaginable, floam has become a staple for ASMR enthusiasts and slime makers alike. Making a "giant" batch takes the experience to the next level, offering enough volume for deep pokes, loud crunches, and impressive stretches.
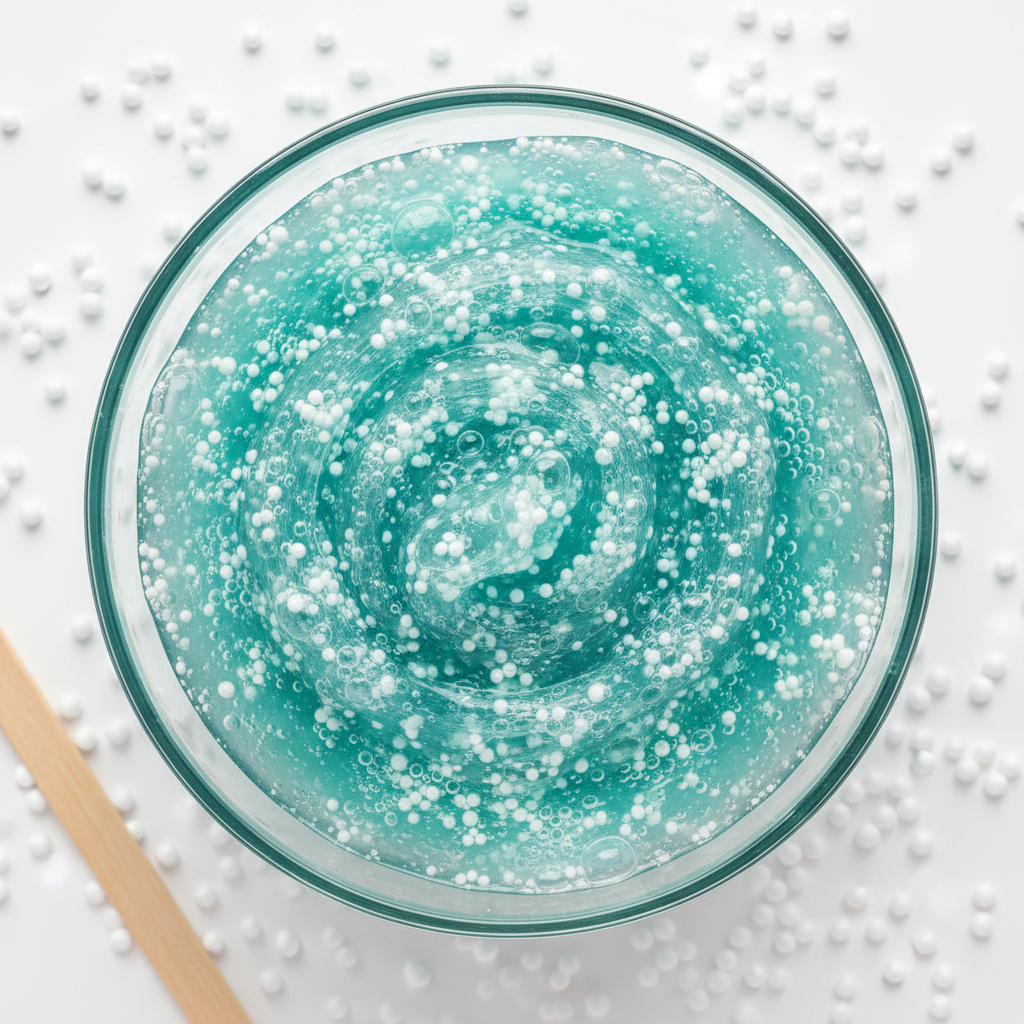
Floam is unique because it isn't just about the slime; it's about the interaction between the adhesive base and the polystyrene beads. When done correctly, the beads stay suspended in the slime, creating a "bubbly" look that resembles foam. In this guide, we will walk you through the precise steps to create a massive, multi-colored masterpiece that won't lose its crunch.
Essential Ingredients and Supplies
To create a giant batch of rainbow floam, you need to scale your ingredients carefully. We recommend working with at least a gallon of glue to ensure you have enough volume to create six distinct rainbow sections.
- White PVA Glue: 1 Gallon (School glue works best for floam as it holds beads better than clear glue).
- Slime Activator: Borax solution (1 teaspoon of borax powder dissolved in 1 cup of warm water).
- Polystyrene Foam Beads: 5-10 quarts of small foam beads (Micro-beads provide the best crunch).
- Food Coloring or Pigments: Red, Orange, Yellow, Green, Blue, and Purple.
- Glycerin: Optional, to keep the slime stretchy.
- Large Mixing Bowl: A 5-gallon bucket is actually ideal for "giant" batches.
The Foundation: Perfect Base Slime
The secret to a successful floam is a slightly "over-activated" base. Because the foam beads occupy so much volume, they can cause the slime to feel stickier over time. A firm base prevents the beads from falling out (a common issue known as "bead fallout").
Start by pouring your gallon of glue into your large container. If you want a softer texture, add 1/2 cup of water to the glue and mix thoroughly. Slowly add your borax activator one tablespoon at a time. For a giant batch, you will need to use your hands once the mixture becomes too thick for a spoon. Knead the slime until it is no longer sticky to the touch, but still has enough "tack" to grab onto the beads.
Mastering the Rainbow Gradient
Once your giant white base is ready, it is time to divide and conquer. Separate your large slime batch into six equal portions. For a standard 1-gallon batch, each portion will be approximately 2-3 cups of slime.
Use high-quality food coloring to dye each portion:
- Red: Use concentrated gel for a deep crimson.
- Orange: Mix red and yellow or use a dedicated orange tint.
- Yellow: Use sparingly, as yellow can easily be overwhelmed.
- Green: A bright neon green looks fantastic in floam.
- Blue: Royal blue provides a great contrast.
- Purple: Ensure this is well-mixed to avoid a muddy look.
The Floam Factor: Bead Integration
Now comes the "floam" part. You will add the foam beads to each of the six colored batches separately. The ratio for "True Floam" is roughly 2 parts beads to 1 part slime. You want the slime to act as the glue that holds the beads together, rather than having the beads floating in a sea of slime.
Spread one color of slime out flat on your workspace. Pour a generous amount of foam beads over the center and fold the slime over them. Knead gently. Repeat this until the slime is packed with beads. If the beads start falling out, add a small drop of glycerin or a tiny bit of fresh glue to increase the tackiness.
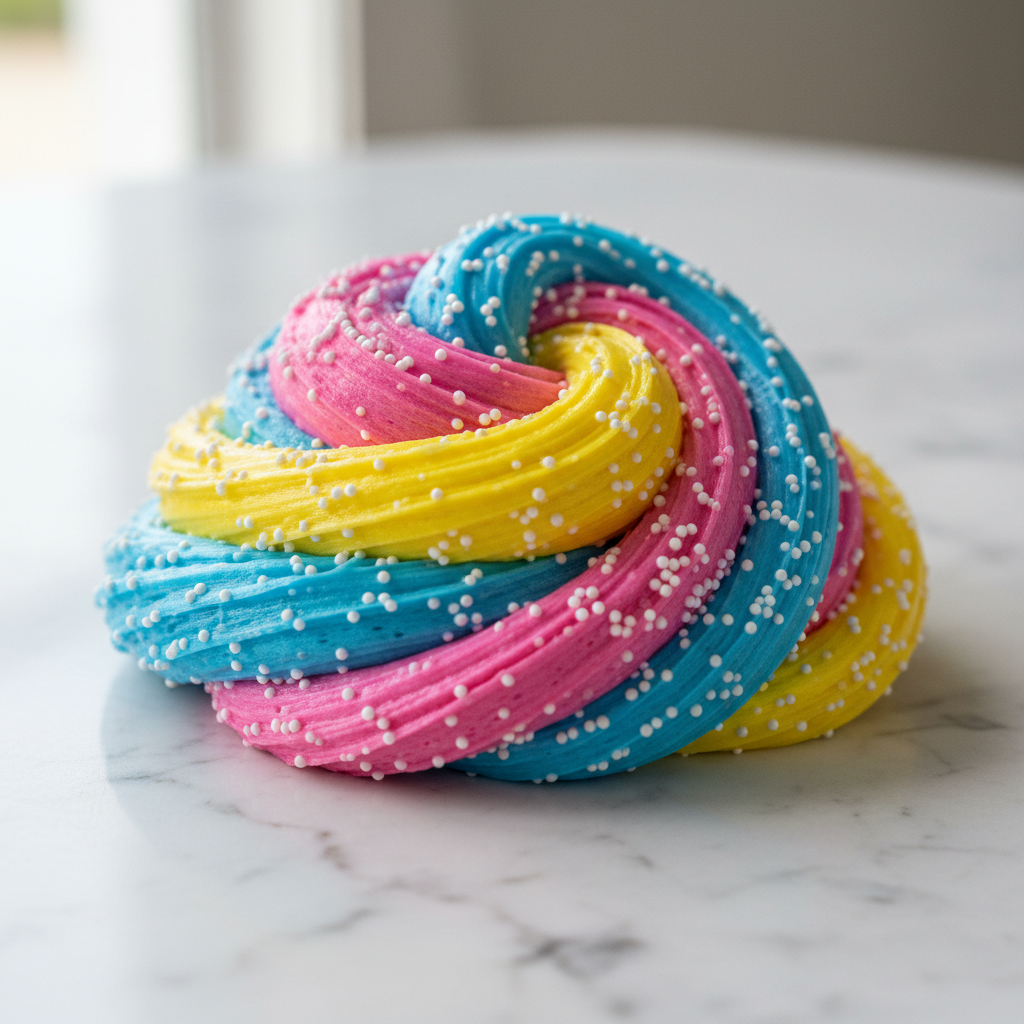
Assembly: Creating the Giant Swirl
This is the most visually rewarding step. To create the "Giant Rainbow" effect, you need to lay each color out in a long rope shape. Arrange them side-by-side in the order of the spectrum: Red, Orange, Yellow, Green, Blue, and Purple.
Once they are lined up, gently press them together. You can now lift the entire rainbow and perform a "giant stretch." As you fold the rainbow over itself, the colors will begin to swirl without immediately mixing into a brown mess. This creates the iconic rainbow floam look often seen in viral videos.
Troubleshooting Common Floam Issues
Bead Fallout: This is the #1 problem. It usually means your slime is too hard or over-activated. To fix it, add a little bit of clear glue or glycerin to the slime and knead it until it becomes stickier.
Slime Melting: Over time, the chemicals in the foam beads can cause the slime to liquefy. If your rainbow floam becomes a sticky soup, simply add a teaspoon of activator and re-knead.
Color Bleeding: In a rainbow batch, the colors will eventually blend. To slow this down, ensure each color is fully set and not too "wet" before assembling them. Store the colors separately if you want them to stay distinct for multiple play sessions.
Storage and Slime Longevity
Because this is a giant batch, you will need a massive airtight container. A 5-quart plastic tub with a locking lid is perfect. Keep your floam in a cool, dry place. Heat will accelerate the "melting" process of the slime.
Always wash your hands before and after playing with floam. Bacteria from your hands can grow in the slime, causing it to smell or change texture. If kept clean and airtight, your giant rainbow floam can last for 2 to 4 months.
Frequently Asked Questions
Yes, but clear glue floam (often called "crunchy slime") is more prone to bead fallout and shows air bubbles more easily. White glue provides a more "dough-like" floam experience which is better for beginners.
For a true floam texture, you will need at least 8 to 10 quarts of foam beads for a full gallon of glue-based slime.
When you mix all the colors of the rainbow together (Red, Yellow, Blue, etc.), the pigments eventually combine to create a brown or grey color. To prevent this, enjoy the "swirled" look but avoid over-mixing the batch into a single ball.